A few weeks ago I discovered a cool new art project to do with my kids, it started off with making a custom nameplate but it was such a cool technique that I wanted to apply it to another project theme. I call it a tintype. And I suppose I like calling it that not only because it somewhat resembles one but I am, after all a photographer, and all things about this industry, young and old fascinate me. If you want to know more about real actual tintypes that were made around the mid 1800s, click here for a brief but interesting History of Photography 101 lesson.
Now on to my tintypes...I start off with 2 Ribba square shadow box frames from Ikea. I love these frames! They work so well because it gives you one of the supplies that you need in addition to giving you a great way to display the artwork when you’re done. Kills two birds with one stone! They have a very sturdy back with a hanger on it, and it’s perfect for this art project. Open up the frames take out the brown back and have your kids draw a robot (make sure metal hanger is on the back), they can make mistakes and draw it until it’s just as they want. No one will see the mistakes so they can take their time with it.

When they’re happy with their drawing, get out the glue and have them trace over their robot design. Wait for the glue to completely dry, you’ll know it’s dry when it’s hard and translucent. Then take some aluminum foil and attach it to the back of the board so it covers the dried glue.
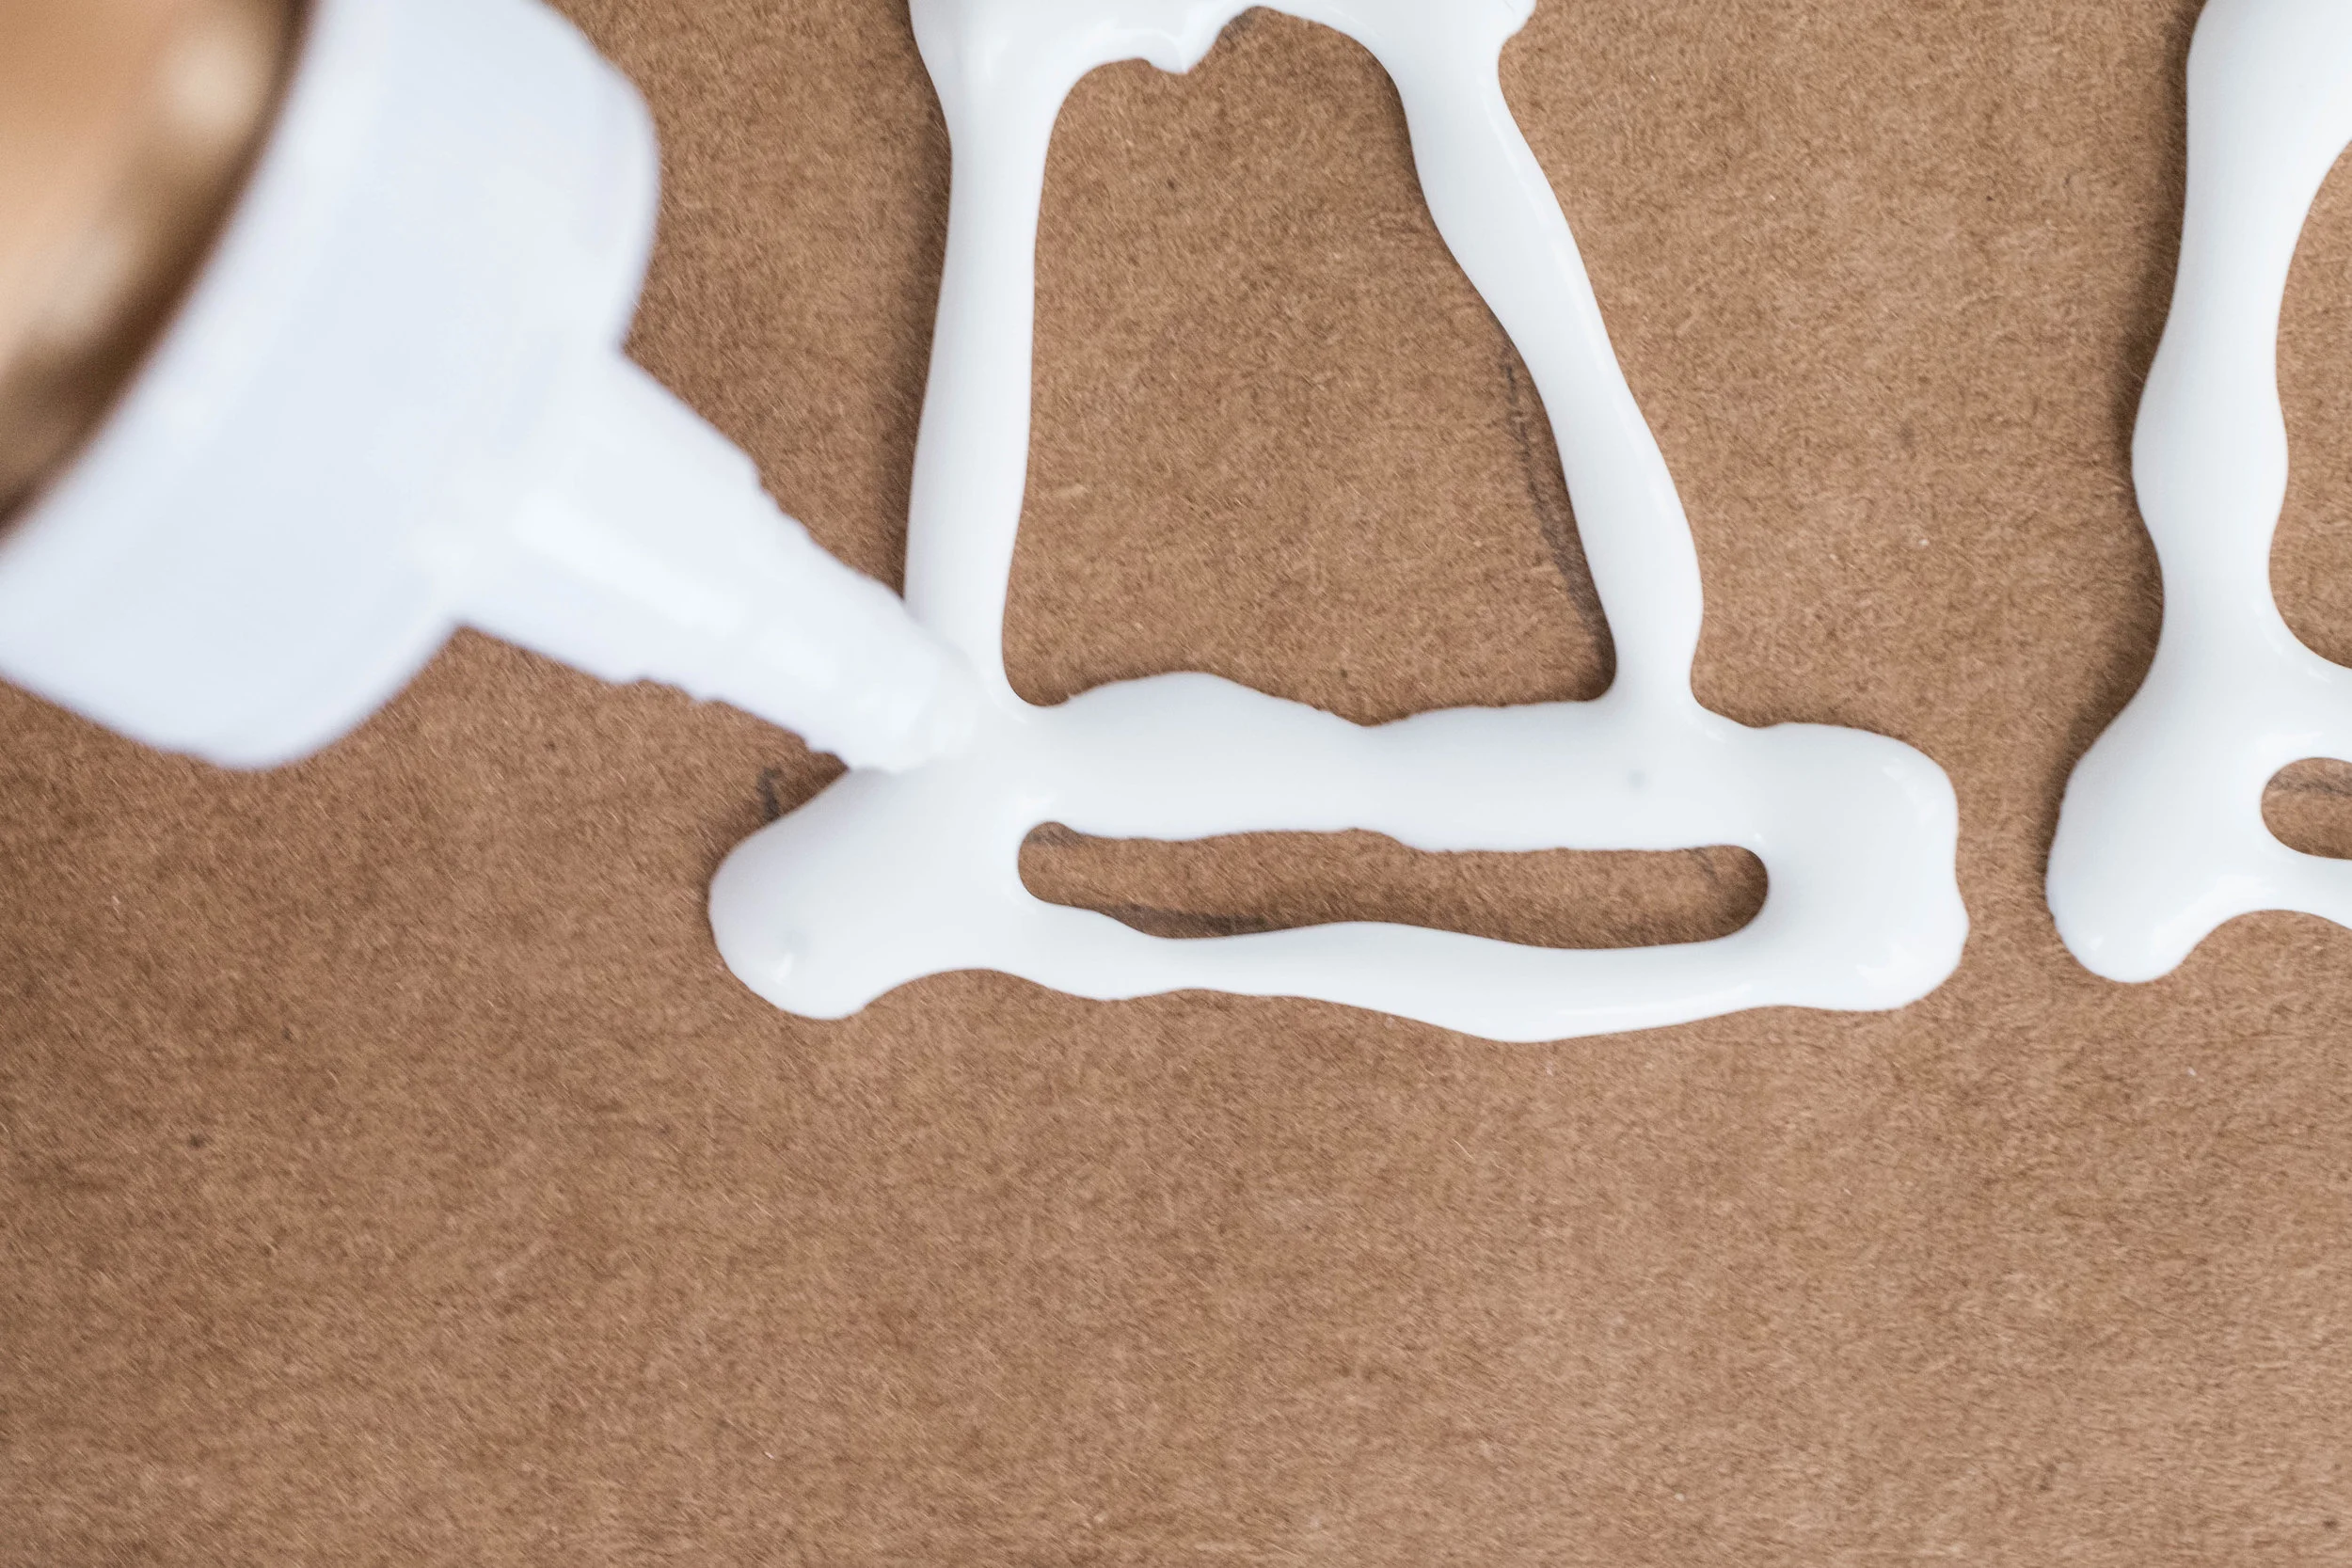


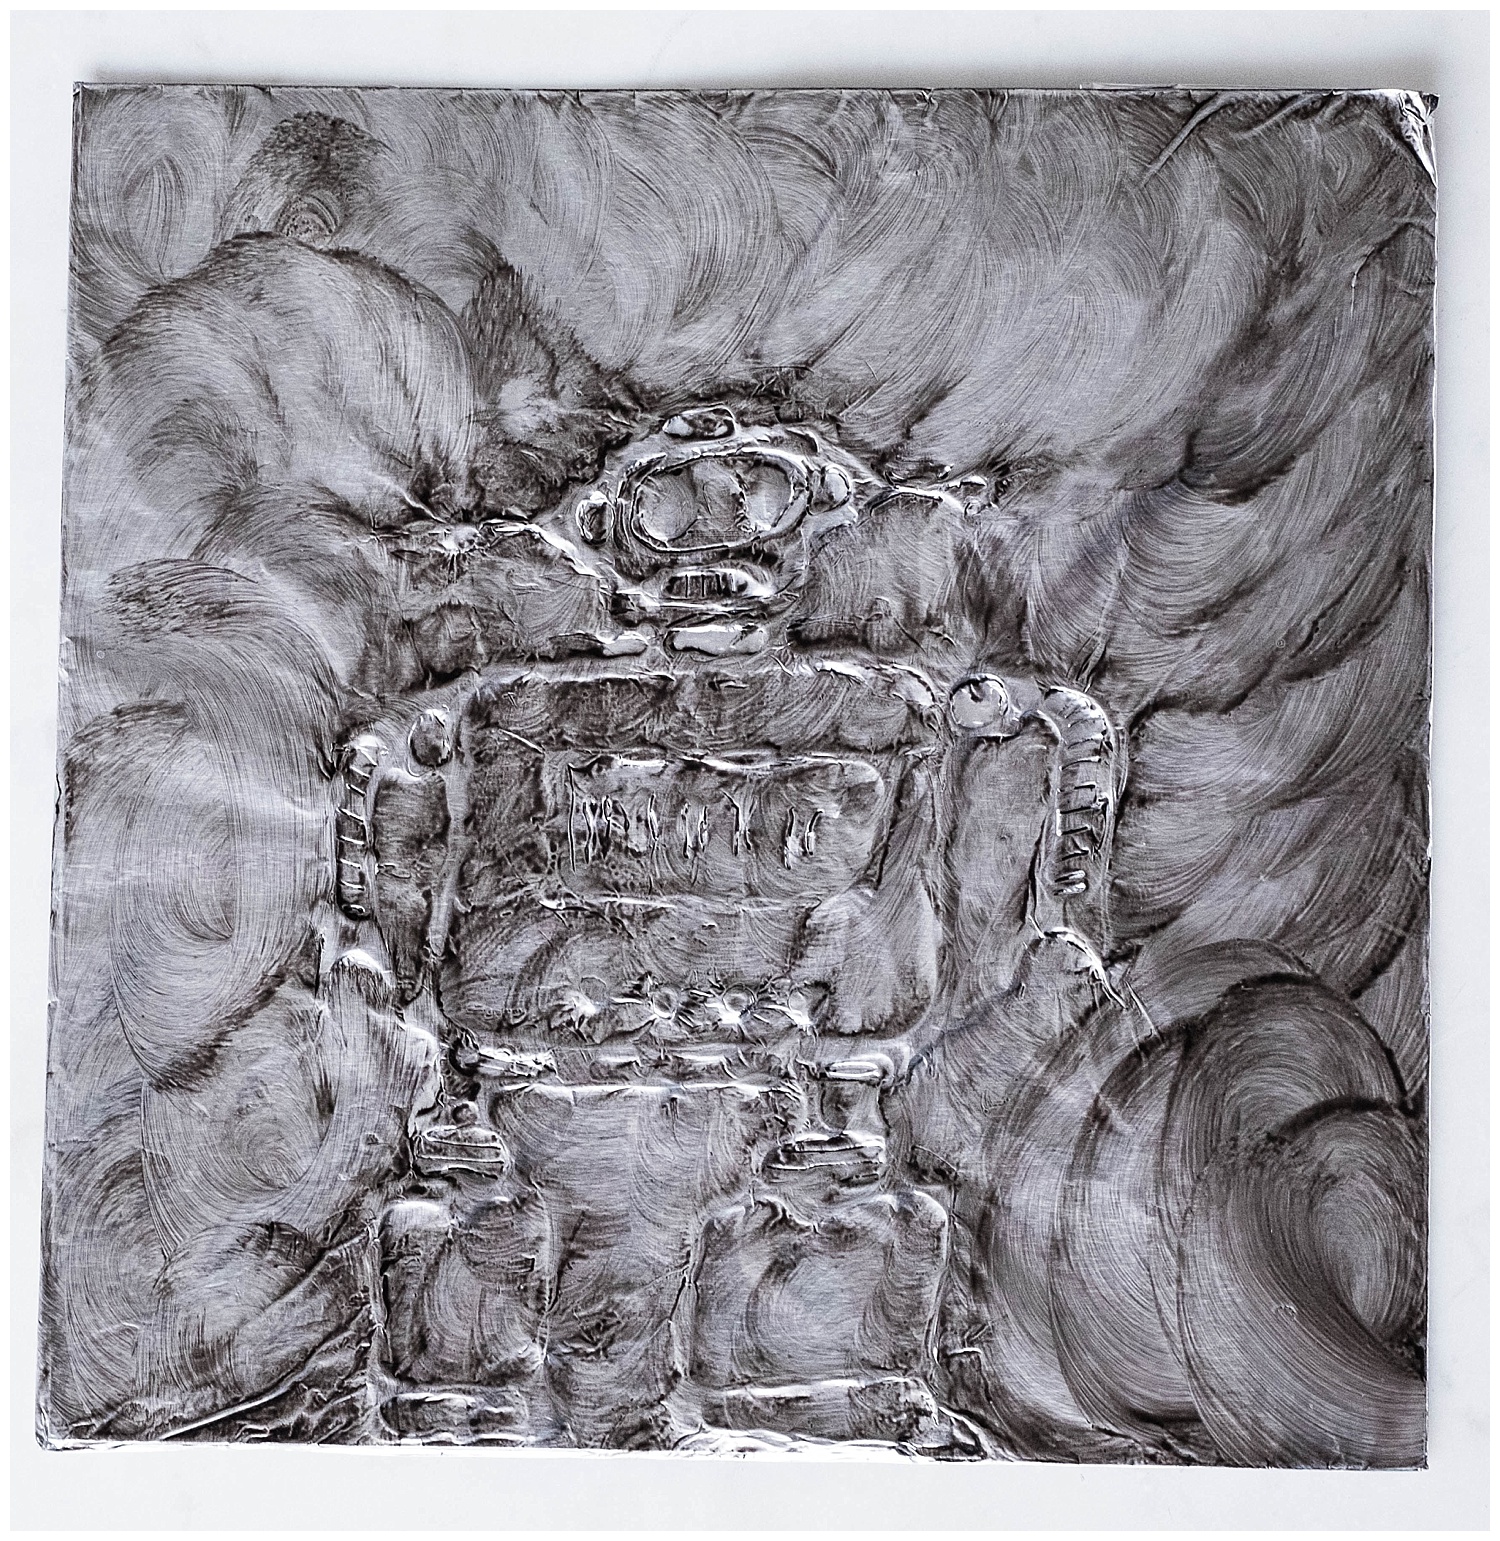
Gently rub your fingers over all the hard glue surfaces of the design and you’ll start to see the robot form around the foil. Be careful not to press too hard or you’ll make a hole in the foil. If you’d like to add small details, you can take a blunt pencil and carefully add some lines or dots on top of the foil.


After you’ve imprinted the robot design on the foil, get some black shoe polish, and gently swirl around and over the design. It’ll have some neat swirl patterns that only adds to the character of these tintypes. Let the shoe polish dry and then place back in the frames.


If you want to do a custom nameplate (or any other cool design!) follow all the instructions listed here and instead of drawing a robot have them write their name. I could do these all day, they are so fun to do and the end result is so cool!